When I think about enhancing any gathering or cozy evening, there’s one dessert that springs to mind: a classic apple pie. There’s something about that warm, sweet filling emerging from a perfectly flaky crust that wraps itself around you like a hug.
Now, pair that with a scoop of vanilla ice cream, and you’ve got the essence of comfort in a bowl! But let’s take this comforting classic to the next level by incorporating cornstarch into the mix. Trust me; your taste buds will thank you.

Apple pie is an iconic dessert that evokes childhood memories, sweet family gatherings, and festive celebrations. While the name alone brings a smile, the harmonious blend of tart apples, warm spices, and a delightful crust is what makes this pie timeless.
Today, I’m excited to share a recipe that not only showcases the many flavors of traditional apple pie but also introduces cornstarch to achieve that perfect filling consistency.
You Might Like These Recipes!
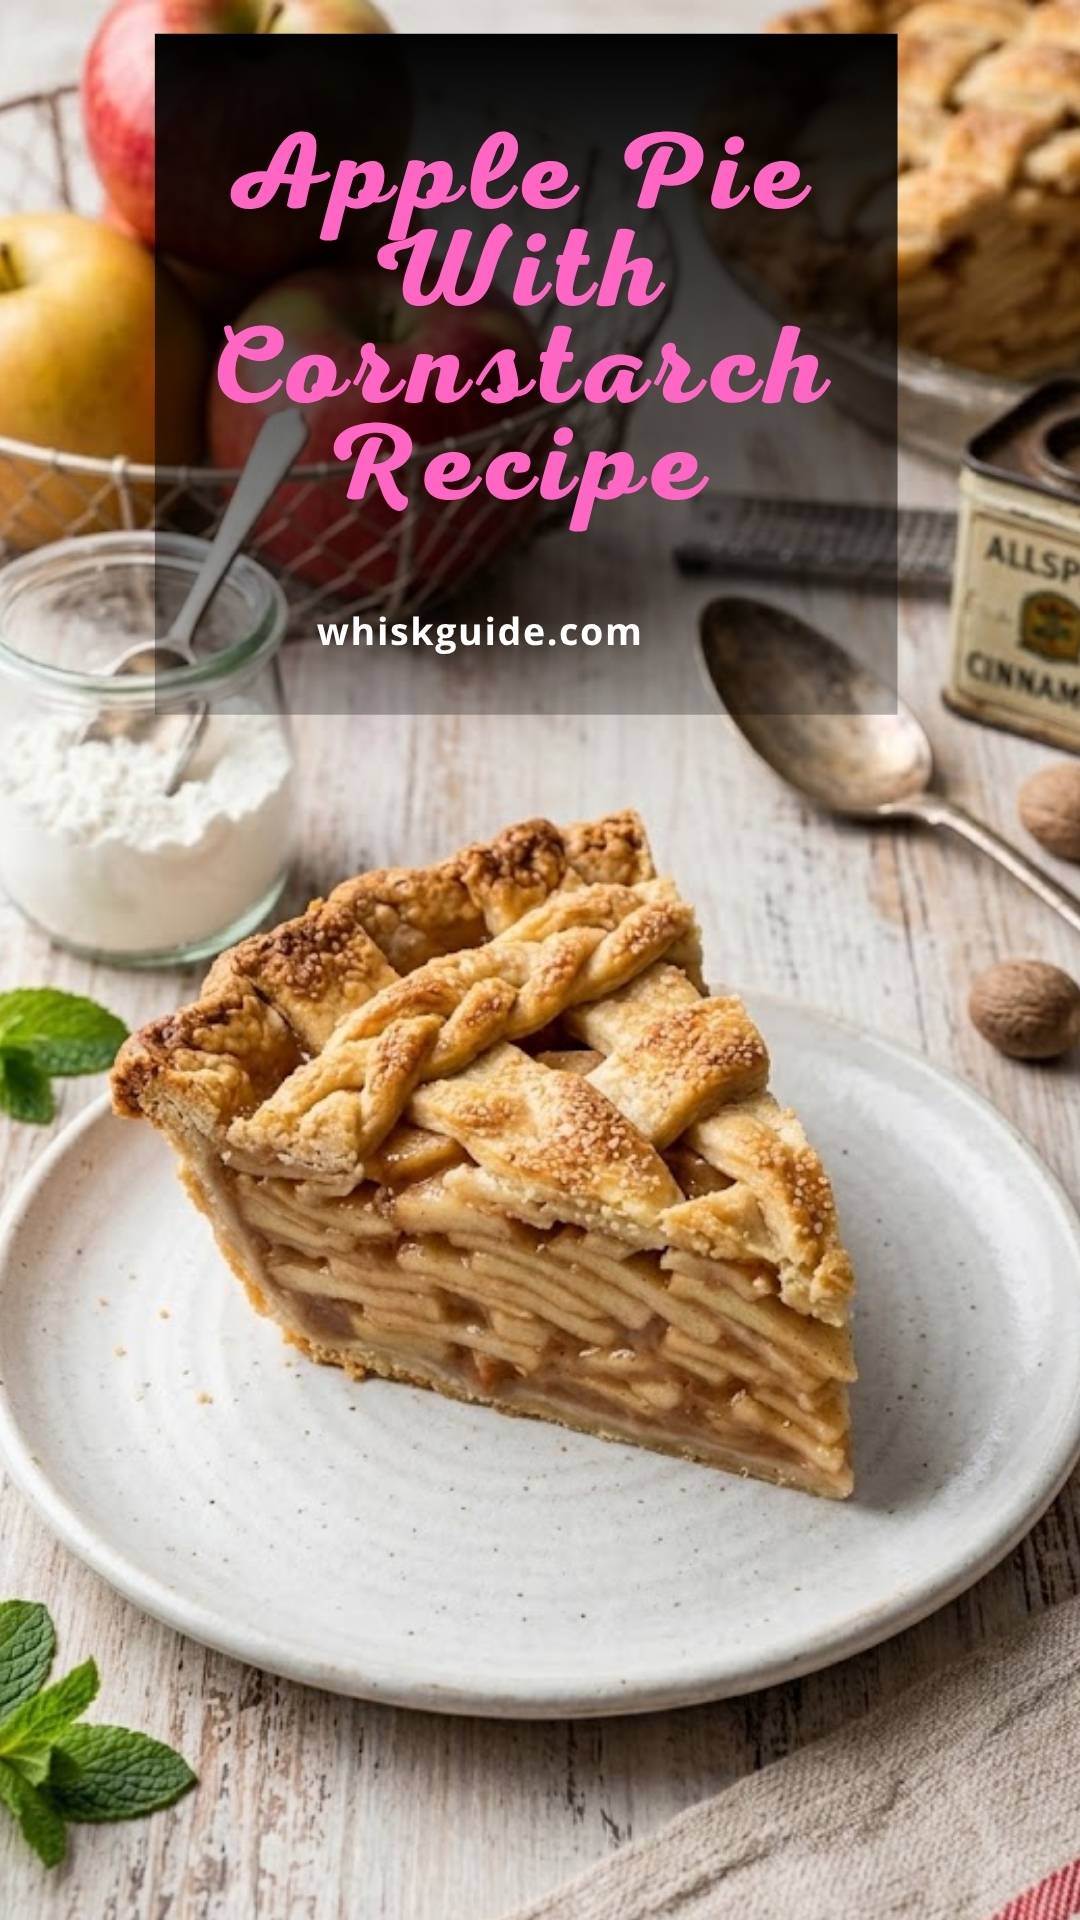
What is Apple Pie with Cornstarch Recipe?
This recipe for apple pie combines fresh apples with a sprinkle of sugar and spices, all thickened to perfection with a bit of cornstarch. Cornstarch is a game changer! It helps the filling to set beautifully, preventing it from becoming runny, which can often happen with traditional recipes. Using Granny Smith and Honeycrisp apples balances sweetness with tartness, while the spices add warmth and depth. When you pull that pie out of the oven, the smell alone will have everyone flocking to the kitchen!
Why This Recipe Works
The beauty of this apple pie recipe lies in its simplicity and effectiveness. By using cornstarch, you not only achieve a desirable thickness in your filling but also maintain the fresh apple flavor and texture. The mix of apples used ensures a dynamic flavor profile, and the spices lend warmth without overpowering the palate. Moreover, an egg wash on the crust encourages that golden-brown finish, ensuring every bite is equally delightful.
How Does It Taste Like?
This apple pie tastes like a warm hug on a chilly evening; the filling bursts with a mosaic of flavors where the sweetness of the apples dances with the warmth of cinnamon and subtle hints of cloves and nutmeg. The pie crust is buttery and flaky, providing just the right amount of contrast to the tender apple filling. Each slice is a perfect bite of nostalgia with a twist!
What Sets This Recipe Apart from Other Apple Pie with Cornstarch Variations?
What differentiates this recipe from traditional ones lies in the careful selection of apple varieties and the balanced spice mix. While many recipes depend solely on bottled ingredients, this one uses freshly sourced elements for a fresher taste. It also focuses on a handmade approach with a simple pie crust recipe rather than opting for pre-made store varieties. You’ll appreciate the depth of flavor in this version that feels both classic and modern.
The Ingredients

To create this delicious apple pie, you’ll need the following ingredients:
– 3 lbs of apples (I recommend using 3 large Granny Smith apples and 3 large Honeycrisp apples)
– 1 tablespoon lemon juice
– 2 teaspoons ground cinnamon
– 1/2 teaspoon ground allspice
– 1/4 teaspoon ground cloves
– 1/4 teaspoon ground nutmeg
– 1/2 teaspoon kosher salt
– 3/4 cup + 1 tablespoon granulated sugar, divided
– 3 tablespoons unsalted butter
– 2 tablespoons all-purpose flour
– 2 tablespoons cornstarch
– 1 recipe homemade pie dough (2 crusts)
– Egg wash: 1 egg beaten with 1 tablespoon milk or water
– Optional: 1 teaspoon vanilla extract and a dash of nutmeg for a deeper flavor
Ingredients From : tastesbetterfromscratch.com
How to Make Apple Pie with Cornstarch Recipe?
Let’s dive into the step-by-step process that transforms the ingredients into a pie that will steal the show at your next family dinner. The beauty of this recipe lies in its ease and the warm aromas that fill your kitchen as it bakes. Are you ready to channel your inner baker?
Instructions
Step 1: Prepare the Apples

Begin by peeling, coring, and thinly slicing your apples. If you’re a fan of kitchen gadgets, a Johnny apple peeler will make this process a breeze, allowing you to peel, core, and slice all at once. Those apple slices should be thin enough to cook through but thick enough to hold their form in the pie.
Step 2: Mix the Spices and Sugar

In a mixing bowl, whisk together the ground cinnamon, ground allspice, ground cloves, ground nutmeg, kosher salt, and three-quarters cup of granulated sugar. Mixing these dry ingredients in advance allows their flavors to meld before they meet the apples.
Step 3: Cook the Apples

In a large skillet, melt the butter over medium heat. Once the butter starts to foam but before it browns, add the sliced apples with lemon juice—a little acidity to brighten the flavor. Sprinkle your sweet spice mix over the apples, gently stirring to coat. Let this delicious mixture cook for about 3-5 minutes until the apples are slightly tender.
Step 4: Thicken the Filling

Next, sprinkle the flour and cornstarch directly over the apple mixture. Toss everything together until the apples are evenly coated. The cornstarch will help create that perfectly thick filling we all love in a pie! Remove the skillet from the heat and let it cool to room temperature. If you want to speed up this process, transferring the apple mix to a baking sheet will help it cool fast!
Step 5: Preheat the Oven

While your filling cools, prepare your oven. Place a large baking sheet on the middle rack and preheat the oven to 425°F (220°C). This step ensures you get a beautifully crisp bottom crust, so don’t skip it!
Step 6: Roll Out the Pie Crust

Take one disc of your homemade pie dough from the refrigerator and roll it out into a circle about 12 inches in diameter. Gently place this crust into a 9-inch pie dish and pop it into the fridge while you roll out the second crust. This keeps the dough cold and makes for a flakier crust.
Step 7: Assemble the Pie
Retrieve the pie pan from the fridge and pour in your apple filling. Now, it’s time to add the second layer of dough. You can either cover the filling entirely and cut a few slits in the top for ventilation or get fancy with a lattice crust. Pinch the edges together to seal your pie, and use your fingers or a fork to crimp the edges.
Step 8: Brush with Egg Wash
Mix one beaten egg with a tablespoon of milk or water to create your egg wash. Lightly brush the top of the pie with this shiny mixture and sprinkle a tablespoon of sugar on top. This will give your crust that extra crisp and a delightful sheen.
Step 9: Bake Your Pie
Place your pie on the hot baking sheet in the preheated oven. Bake for the first 20 minutes at 425°F (220°C) before reducing the temperature to 375°F (190°C). Allow the pie to continue baking until the filling is bubbling and the top crust turns a beautiful golden brown. This takes an additional 30 to 40 minutes. If you notice the crust browning too quickly, feel free to tent it with aluminum foil.
Step 10: Cool and Serve
Once your pie is baked to perfection, remove it from the oven and let it cool completely—at least 2 to 3 hours. This cooling time allows the filling to set up nicely, so it doesn’t fall apart when sliced. Trust me, it’s worth the wait!
Notes
– Use a mix of apples for great flavor and texture. Granny Smith offers tartness, while Honeycrisp adds sweetness.
– Don’t skip the cornstarch! It ensures you have a beautifully thick filling.
– Let your filling cool. This step is essential in preventing a soggy pie.
– Make your pie crust ahead of time. You can make it a day in advance and refrigerate it.
– For a twist, add a splash of vanilla extract to your apple filling for extra depth of flavor.
How Do You Store This Apple Pie with Cornstarch Recipe?
After you’ve enjoyed your apple pie, it’s essential to store the leftovers correctly. Keep any uneaten pie covered at room temperature for up to 2 days. For longer storage, place it in the refrigerator for up to a week. If you want to keep it longer, you can freeze slices wrapped tightly in plastic wrap and then placed in an airtight container for up to three months. Just thaw at room temperature before enjoying.
Sides for Apple Pie with Cornstarch Recipe
If you want to elevate the apple pie experience, consider pairing with these delightful options:
– Vanilla Ice Cream: The creamy texture complements the warm pie, creating a classic dessert combination.
– Whipped Cream: Light and airy, it adds a delicious fluffiness that balances the denser filling.
– Cheddar Cheese: Try a slice of sharp cheddar on the side for a sweet-savory contrast that’s especially popular in some cultures.
– Caramel Sauce: Drizzle some warm caramel atop your slice for an added layer of sweetness and richness.
– Spiced Tea or Coffee: A warm beverage, particularly something spiced, brings out the flavors of the pie while providing a cozy accompaniment.
What Alternatives Can You Use for the Ingredients if They Are Not Present in Your Kitchen?
Running low on supplies? Here are some substitutes you can use:
– Cornstarch: You can replace it with arrowroot powder or potato starch in a 1:1 ratio for a similar thickening effect.
– Butter: Coconut oil or unsalted margarine can be used as alternatives, keeping the richness intact.
– All-purpose flour: For gluten-free enthusiasts, use a 1-to-1 gluten-free baking flour mix as a substitute.
– Granulated sugar: Brown sugar can add an extra depth of flavor due to its molasses content; use the same amount.
– Oranges for Lemon Juice: If you don’t have lemon juice, orange juice can provide similar acidity and a different citrus flavor.
Apple Pie With Cornstarch Recipe
Ingredients
Equipment
Method
- Begin by peeling, coring, and thinly slicing your apples. If you’re a fan of kitchen gadgets, a Johnny apple peeler will make this process a breeze, allowing you to peel, core, and slice all at once. Those apple slices should be thin enough to cook through but thick enough to hold their form in the pie.
- In a mixing bowl, whisk together the ground cinnamon, ground allspice, ground cloves, ground nutmeg, kosher salt, and three-quarters cup of granulated sugar. Mixing these dry ingredients in advance allows their flavors to meld before they meet the apples.
- In a large skillet, melt the butter over medium heat. Once the butter starts to foam but before it browns, add the sliced apples with lemon juice—a little acidity to brighten the flavor. Sprinkle your sweet spice mix over the apples, gently stirring to coat. Let this delicious mixture cook for about 3-5 minutes until the apples are slightly tender.
- Next, sprinkle the flour and cornstarch directly over the apple mixture. Toss everything together until the apples are evenly coated. The cornstarch will help create that perfectly thick filling we all love in a pie! Remove the skillet from the heat and let it cool to room temperature. If you want to speed up this process, transferring the apple mix to a baking sheet will help it cool fast!
- While your filling cools, prepare your oven. Place a large baking sheet on the middle rack and preheat the oven to 425°F (220°C). This step ensures you get a beautifully crisp bottom crust, so don’t skip it!
- Take one disc of your homemade pie dough from the refrigerator and roll it out into a circle about 12 inches in diameter. Gently place this crust into a 9-inch pie dish and pop it into the fridge while you roll out the second crust. This keeps the dough cold and makes for a flakier crust.
- Retrieve the pie pan from the fridge and pour in your apple filling. Now, it’s time to add the second layer of dough. You can either cover the filling entirely and cut a few slits in the top for ventilation or get fancy with a lattice crust. Pinch the edges together to seal your pie, and use your fingers or a fork to crimp the edges.
- Mix one beaten egg with a tablespoon of milk or water to create your egg wash. Lightly brush the top of the pie with this shiny mixture and sprinkle a tablespoon of sugar on top. This will give your crust that extra crisp and a delightful sheen.
- Place your pie on the hot baking sheet in the preheated oven. Bake for the first 20 minutes at 425°F (220°C) before reducing the temperature to 375°F (190°C). Allow the pie to continue baking until the filling is bubbling and the top crust turns a beautiful golden brown. This takes an additional 30 to 40 minutes. If you notice the crust browning too quickly, feel free to tent it with aluminum foil.
- Once your pie is baked to perfection, remove it from the oven and let it cool completely—at least 2 to 3 hours. This cooling time allows the filling to set up nicely, so it doesn’t fall apart when sliced. Trust me, it’s worth the wait!
Nutrition
Notes
Tried this recipe?
Let us know how it was!FAQs
1. Why do you use cornstarch in apple pie?
Cornstarch thickens the filling, ensuring it holds its shape and doesn’t become soupy once baked.
2. Can I use frozen apples for this recipe?
Yes, but ensure they are well-drained and thawed before using to avoid excess liquid in your filling.
3. How do I know when my pie is done baking?
The pie is done when the crust is golden brown and the filling is bubbling through the slits or lattice.
4. Can I make this pie ahead of time?
Absolutely! You can make it a day or two in advance and store it in the refrigerator. Reheat it before serving for best flavor.
5. What can I do with leftover pie?
Leftover pie can be sliced, stored in the refrigerator for up to a week, or frozen for longer storage—just reheat before enjoying!
Conclusion
There you have it—a delightful apple pie with cornstarch that’s bursting with flavor and is sure to elevate any occasion. From the first slice to the last crumble, it promises to be a hit, whether you’re hosting a gathering or just craving a slice of comfort at home.
Not only is this pie relatively straightforward to whip up, but it also results in a deliciously satisfying dessert. So, roll up your sleeves, gather your ingredients, and make this sweet, comforting dish today!